PrestaShop: instructions for beginners on using a free CMS for e-commerce. Adding a language to the store
Prestashop is loved by many online entrepreneurs. This engine is designed specifically for e-commerce, so it has wide capabilities and functions for creating your own online store. This is not difficult to do, but questions (especially for beginners) may arise. We decided to save you from the boring study of manuals and references for this CMS, and recorded short videos with which you can install Prestashop step by step and make .
From the article you will learn:
How to install Prestashop
The first step in working with Prestashop is installation on hosting. You won’t have any difficulties with this if you watch our video in which we tell you:
— what are the minimum system requirements to install this engine;
— how to install Prestashop using cPanel;
— what settings need to be made after installation.
How to administer a site
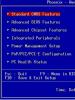
Having successfully installed the engine, you need to understand its settings and administration. You won't come across a lot of settings, since all the main ones already work by default. This is a big advantage of Prestashop over other CMSs, such as WordPress or Joomla, which require the installation of special add-ons for e-commerce. Therefore, it’s quite easy to use Prestashop. However, some configuration still needs to be done. So what will you learn from the video:
— how to change the interface language;
— what are the main buttons on the control panel;
— how to customize the menu display;
— what categories are on the menu.
How to set up a website
Let's look at the most important settings for running an online store on Prestashop. After watching our video lesson you will learn:
— how to enable maintenance mode;
— how to add new users with rights to work in the admin panel;
— how to customize a Prestashop theme — make changes to the site design;
— how to work with demo data.
How to work with product categories
Let's take a closer look at product categories and what you can do with them. Using categories, products are grouped according to certain characteristics, which simplifies the work with the online store for both its owner and users. We have prepared a video for you on the topic:
— what are subcategories and how to configure their display;
— how to add new categories;
— how to customize the appearance of categories for the user;
— how to fill in all the required fields when adding a category;
— how to add a Prestashop product to an existing category.
How to work with modules
Modules are an important component of a CMS. Almost all settings for the appearance of the site will be made using modules. Let's see how to work with them:
— where the block with modules is located in the admin part;
— how to add, remove, edit or change modules.
How to add new products to the catalog
What is an online store without products? We got to this function. Prestashop provides ample opportunities to work with products, in addition to directly adding and editing them. In the video we'll look at:
— how to add combinations and characteristics of products;
— working with files: customization and attachments;
— how to add a product step by step and configure its display;
— how to enter prices for goods;
— how to work with SEO fields;
— how to upload new files.
Stay with us and soon we will tell you about other important nuances of working with an online store on Prestashop. And don't forget to subscribe to our channel!
The PrestaShop engine requires a MySQL database to store information. Before you start installing PrestaShop, make sure that the MySQL database has already been created. You can do this through your hosting control panel using the phpMyAdmin tool.
View detailed instructions on how to create a MySQL database. If you have any difficulties at this stage, please contact your hoster for help.
When creating a MySQL database, you will need to provide a database name, username, password, and remember the database server address. Save all this data as you will need it when installing PrestaShop.
Installing the PrestaShop engine
1. Server requirements
Make sure your hosting meets PrestaShop system requirements:
- System: Unix, Linux or Windows. Unix is recommended.
- Web server: Apache Web server 1.3 or later, Microsoft's IIS Web server 6.0 or later and nginx 1.0 or later.
- PHP 5.2 * or newer.
- MySQL 5.0 or newer.
- At least 32 Mb of RAM on the server (preferably 64 Mb, the more the better).
PrestaShop will work with PHP 5.1 and later, but versions prior to 5.2 contain bugs that may cause some functions to not work (selecting the wrong time zone).
2. Loading
To install PrestaShop you will need to download the engine from the official website www.prestashop.com/ru/download
Enter your name and email in the download section and click the button "Download".
Make sure you download the version of PrestaShop that matches the requirements of the template you choose. All versions of PrestaShop are available on.
3. Extract files
After downloading PrestaShop, you will need to extract the files and folders from the archive.
You can do this using programs WinZip(PC), StuffitExpander(MAC) and so on.
See the following instructions for extracting files from WinZip (PC) and StuffitExpander (MAC) archives.
Attention: if the function is available in your hosting control panel "Unpack" files, you can upload the zip archive itself to the server and unpack it there.
4. Downloading PrestaShop engine files
In case you have unzipped the files locally on your computer, you will need to upload them to the hosting server.
This can be done using the File Manager in your hosting control panel or using FTP managers such as FileZilla, TotalCommander, CureFTP, etc.
You can watch the video instructions on How to upload files to the server or How to upload files using cPanel (WebHost Manager, WHM).
5. Installing the PrestaShop engine
When all the necessary files have been uploaded to the server, you can begin installing the PrestaShop engine. Open your browser and in the address bar write the domain name and path to the Prestashop folder "domain_name/path_to_PrestaShop_directory" and go to this page. You should see a welcome page. Follow the instructions on it to install PrestaShop.
Step 1: Installation Assistant (Language Selection)
Select installation language
Please note: the installation language will not affect the language of your store. By default, installation is offered in English. You can install localization packs to change the store language.
Step 2: Installation Assistant (License Agreement)
Read the license agreement.

Once completed, click the "Next" button.
Step 3: System Compatibility
Check PHP settings and folder permissions. In case of any errors, contact your hoster for help.

If there are no errors, click the "Next" button.
Step 4: Store Tincture
At this point you will need to set up your store. Specify: Store name, currency, time zone, upload logo, etc.
All this data can then be edited through the PrestaShop control panel.

Step 5: System Setup
You already have a MySQL database. Enter your access information in the appropriate fields.
You can obtain the necessary data through your hosting control panel or by contacting the hoster.

Once completed, click the "Next" button.
Step 6: Complete installation
This is the final stage of installation.

For security you need to delete the folder /install/ from your server.
Starting from version 1.5.4, PrestaShop takes upon itself to change the name of the folder containing the control panel: it contains the word "admin" with four random numbers, for example "admin8814". The name change occurs the moment you enter the "admin" folder for the first time: PrestaShop will rename it and then move to the folder with the new name.
Log in to the PrestaShop control panel by going to the newly renamed "admin" folder and you can start filling the store.
In case of any difficulties, you can refer to the official PrestaShop instructions.
Installing a PrestaShop template
If you do not want to waste your time installing the template, you can always order the template installation service using our chat.
1. Import a theme
1. Preparing the template.
Before you continue, make sure you have already downloaded the template and extracted its archive. You can see instructions on how to unpack archives using WinZip and StuffitExpander.
After unpacking the files, you can start downloading the template.
2. Installation.
Open the PrestaShop control panel and go to the page Preferences -> Themes. Click the button at the top of the page Add new theme.
In the shape of Import from your computer click the button Add file and go to the folder "themeinstallator" in the unzipped template:
Select the .zip file with your theme and click the button Save

After this, the theme will begin uploading to the server. You will see a message stating that the download was successful, after which a thumbnail of your new theme will appear in the list of installed themes.

To activate a new theme, hover over the theme thumbnail and click on the button that appears "Use this theme".

The window that appears displays information about the modules used by the theme, the number of modules that will be enabled and disabled. Click to continue Save.

After this, a pop-up window will appear with a message about the successful activation of the theme: the theme was successfully installed, the images were regenerated to the sizes specified in this theme. To complete the installation, click the button Finish.

2. Automatic installation of a template with sample data (Sample data installer)
After installation demo data
In order to install demo template data using the Sample data installer module, you must first go through Step 1 of this instruction. After all the instructions described in Step 1 are completed, the Sample data installer module will automatically be added to your admin panel.
With this module you can very quickly and conveniently install template demo data in just a few clicks. To do this you will need to do the following:
 After you go through all the steps of this simple instruction, you will have a full version of the template with demo data at your disposal.
 3. Manual installation of a template with demo data
If you do not want to waste your time installing the template, you can always order the template installation service using our chat.
After installation demo data, you will receive a store based on PrestaShop completely identical to what you see in the Demo. It will contain examples of products, store settings, modules, etc.
Do not install demo data on a live site! They will replace all products in your store and overwrite any settings.
1. Uploading template files
- Open the template archive
- Go to folder /theme/
- Upload folders /img/, /modules/ And /themes/ to the PrestaShop root folder
Watch the video instructions on how to upload files to the server via FTP and How to upload files using cPanel.
2. Install demo data
Demo data is supplied in a visible .SQL file. It is located in the root folder of the template and is called dump.sql
The Dump.sql file can be installed through the phpMyAdmin tool or your hoster's database panel. You may find the instruction How to Import a SQL Dump useful.
Make sure your version of PrestaShop meets the requirements of the template you are installing. Otherwise the database will be damaged.
After you finish importing the dump.sql file, you will need to activate the template.
In the PrestaShop control panel, go to the section Preferences > Themes, select the desired template in the section Themes and press Save.
3. Adding a language to the store.
After installing the multilingual template, you will need to install the necessary languages (English, Russian, French, Spanish, German). This can be done as follows:
Go to "Localization > Translations" in the control panel, find "Translation exchange", and add languages by selecting them from the drop-down list using the button "Add or update a language".

If you do not want to add some languages, you can extend or disable them in the menu "Localization > Languages".

Basic Instructions
1. How to change the name of the store
In order to change the name of your store, open the PrestaShop control panel and go to the section Preferences > Store Contacts, chapter Contact details.
In field Shop name enter the name of your store and click the button Save to save changes.

2. How to edit a slider
To edit slider images, find the module Image slider for your homepage On the page Modules your PrestaShop store. It's in the modules section Front Office Features. Click the button Configure to edit the module.

On the module settings page, you can change settings (such as width, speed, etc.) and edit slides (slide images, URLs, descriptions, etc.).

Extensions configuration
Olark Live Chat
In order to use the chat available on the template demo, you need to register on the official Olark website. After providing all the necessary information, you will receive a code that needs to be added to the \themes\themeXXX\footer.tpl file before